25 November 2014.
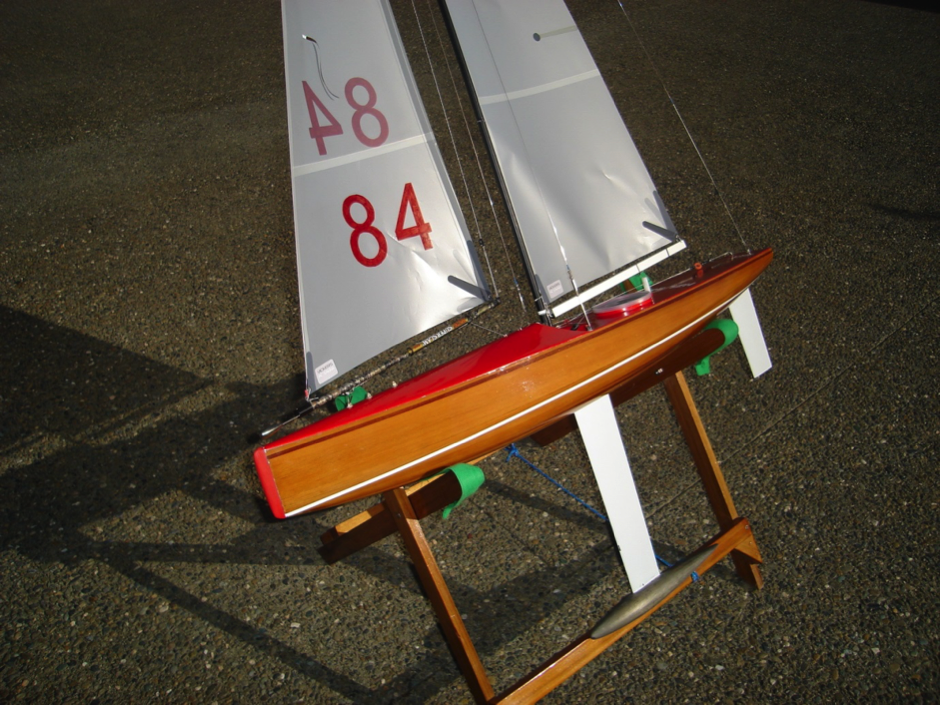
I sold my first cedar V8 to Phil Ramsden in Western Australia and so now have to build a new IOM to replace it.
The Hull.
I was happy with the construction of my first hull, and used the same building jig. This time I made one wide plank from the gunwhale down to the chine with one wide piece of cedar.
I made a thin plywood pattern off the building jig, and cut out a piece of cedar to this pattern, fitted and glued my mahogany sheer plank with a cedar plank above it, all on my workbench. I was pretty fussy in selecting the cedar, it had to be quarter cut which shows the tight grain lines, and I prefer a lighter rather than a darker cedar. I thought this method was easier than planking this area of the hull with individual planks as the area is flat, and if you pick good looking timber, the end result looks great .
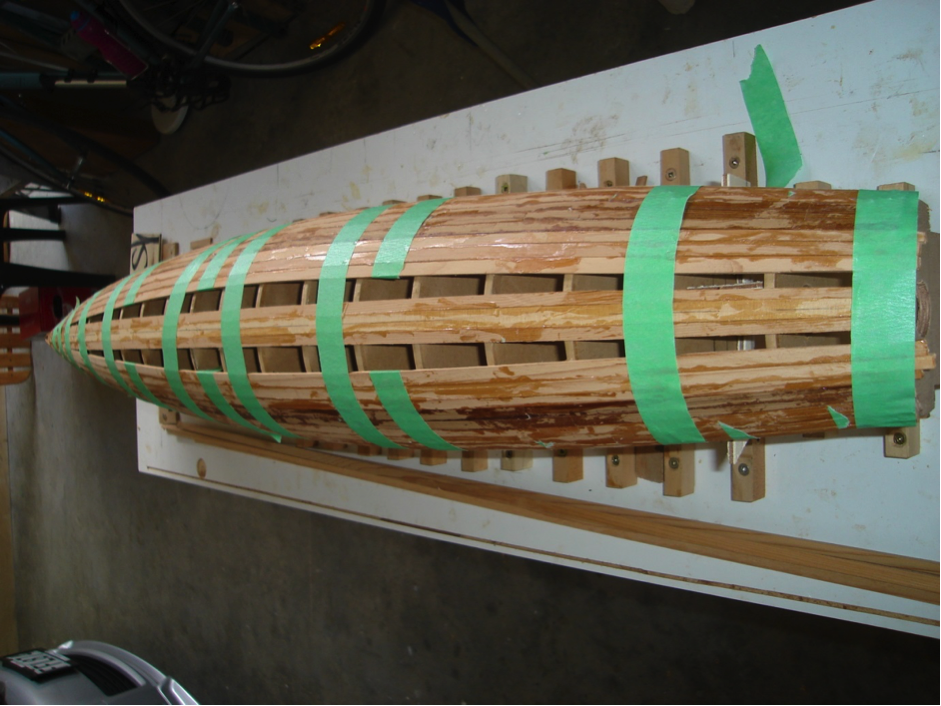
For the rest of the hull I used 8 mm x 2.7 mm cedar planks tapered towards the bow and stern and glued with WEST epoxy thickened with aerosol (glue powder), I used fast hardener to help speed up the process and as it is summertime here in Nelson and 25+ degrees Celsius each day so the glue was drying in a few hours.
I held the planks down with masking tape and some clamps and pins until the glue dried.
For the centreline plank on the bottom I used a plank of New Zealand macrocarpa, which is harder than the cedar as this plank takes a bit more stress with the keel and rudder post rebated though it .
I ran the planking past the stem and the transom to a “dummy” frame and pin the plank ends to these dummies. I do not put pins through the planking as the holes show up in the finished article.
Once the planking was completed I sanded the hull fair taking care to only sand with the grain, as any scratches from sandpaper across the grain will show up in the varnish finish.
Next step was to fibreglass the outside with 50 gram cloth in WEST resin. I then gave the hull a second coat of resin to ensure a good covering over the glass cloth. At this stage I am more concerned about a strong exterior to the hull rather than trying to save weight.
Taking the hull off the building jig, I turned it over and sanded the inside to remove all excess glue, then I fibreglassed the inside. This time I glassed the inside using two pieces of 50 gram cloth, port and starboard and overlapped the glass cloth in the keel area. This was easier to handle compared to my first V8 where I tried to glass the inside with one piece of cloth and had some difficulty. I laid up extra layers of cloth in the vicinity of the keel box and rudder stock area. The hull weighed 380 grams at this stage fibreglassed inside and out, probably 100 grams more than a fibreglass hull.
The Hull and Deck
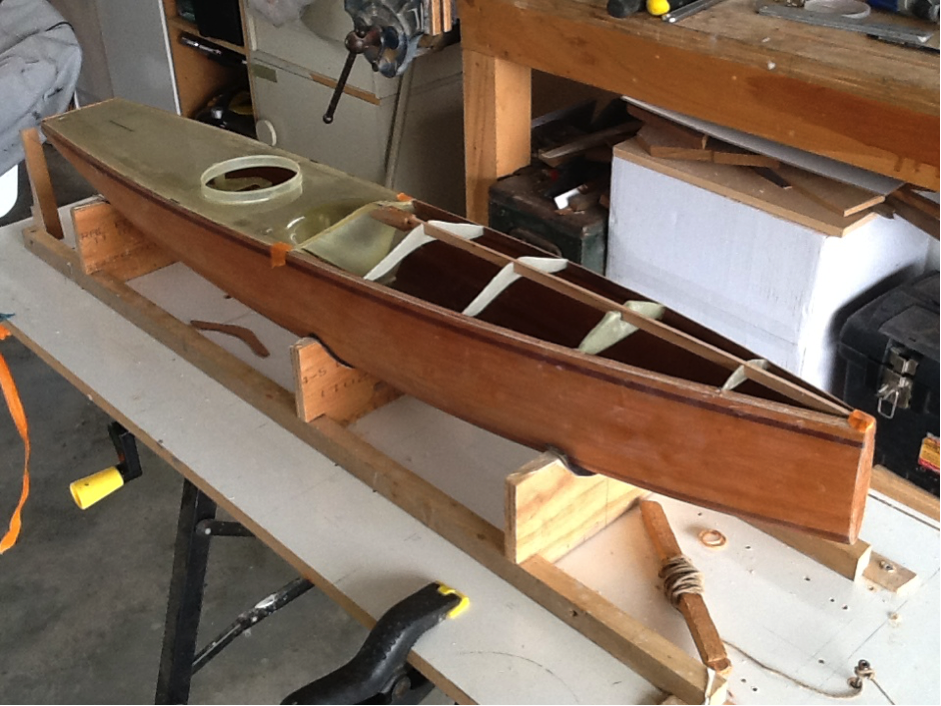
For this V8 I decided to use a V8 fibreglass aft deck which has the upstand for the hatch lid, and the well for the mast and vang to sit in. I also bought the fibreglass keel box, mast box, winch tray, and bulkhead for the chain plates to attach to. So this is a “fusion” cedar and fibreglass boat.
I set the yacht up vertically and epoxy glued all these interior fittings in place, and fitted the aft deck.
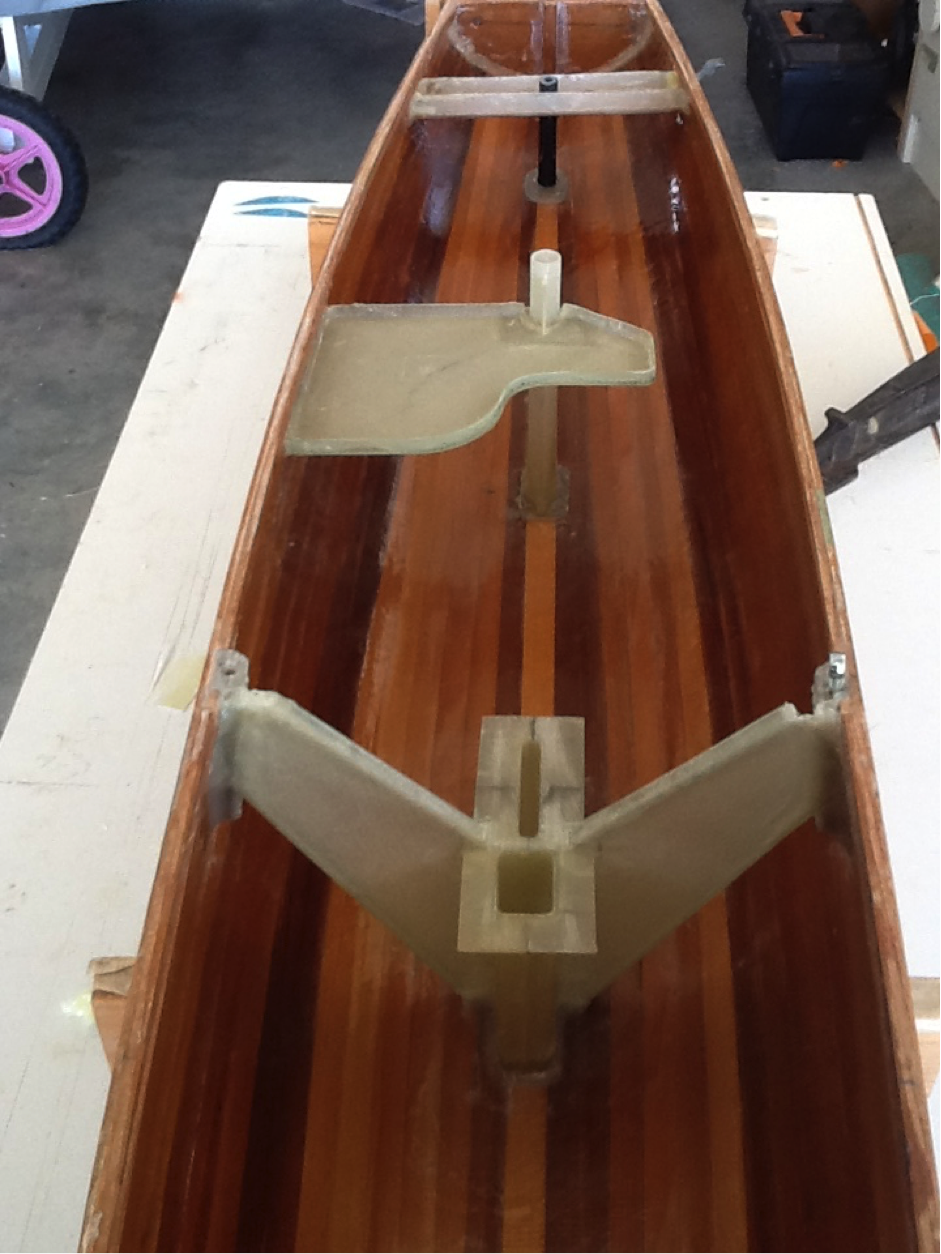
For my rudder stock I purchased a piece of fibreglass tube from ”Killwell “who make fishing rods and fibreglass and carbon tubes for industry in New Zealand. My tube is 8 mm outside diameter and so has a wall thickness of 2 mm. I don’t use metal for tubing as it doesn’t glue as well as fibreglass and also metal tends to corrode with the rudder stock in salt water after a period. I made a fibreglass channel section and glued it in place across the boat and then set the rudder tube up through it.
I glued the servo tray to the hull and to the mainsheet post as shown in the photo below.
For the chain plates I laid up a block of fibreglass about 8 mm square x 40 mm long and glued it onto the hull and the bulkhead to transfer the loads down to the keel box. I then drilled an oversize (4mm) hole in the blocks to the depth of my chain plate eyebolts which are 3 mm diameter. Once the deck was fastened to the hull I filled the holes with resin, letting it soak in completely for about 10 minutes then glued the eyebolts into the oversize holes. The idea of the oversize holes is that there is more surface area and therefore more holding power for the epoxy glue around the chain plate bolts.
For the backstay chainplate I glued a piece of 8 mm square cedar inside the transom and drilled a 4 mm hole down the center and after the deck was glued down I inserted the backstay eyebolt into the hole which was saturated with resin.
The foredeck.
I doubled up the gunwhale in this area and lifted the inside piece higher than the actual sheer line so I could fair the foredeck to it.
I made a kingplank from 8 mm x 4mm cedar, doubled it up at the aft end to take my tube for the mast ram, and doubled it up for the 3 jib boom positions forward, then made some fibreglass deck beams about 1.5 mm thick and glued them across the boat and to the kingplank. I made a 1.5 mm fibreglass web and glued it to the kingplank and down to the bottom of the hull to transfer the jib boom loads.
At this stage I also glued 3 nuts under the kingplank so I could screw my jib boom eyebolts into them once the foredeck was on. I made a template of these positions with the stem as a reference point so when the foredeck was on I could lay the template on the deck and drill through to locate the nuts.
Fitting the aft deck
This is a fibreglass moulding so I rebated the gunwhales and glued it down into the rebate so the deck was flush with the cedar gunwhale, I then laid a strip of 50 gram fibreglass around the gunwhale to seal and protect it.
Great care was taken to glue the mast well part of the aft deck to the top of the centercase and mast box to ensure there are no leaks up the keel slot.
I then sealed the underside of the .8 mm birch ply foredeck and glued it down to the kingplank and deck beams, holding it in place with masking tape until the glue dried
Finishing
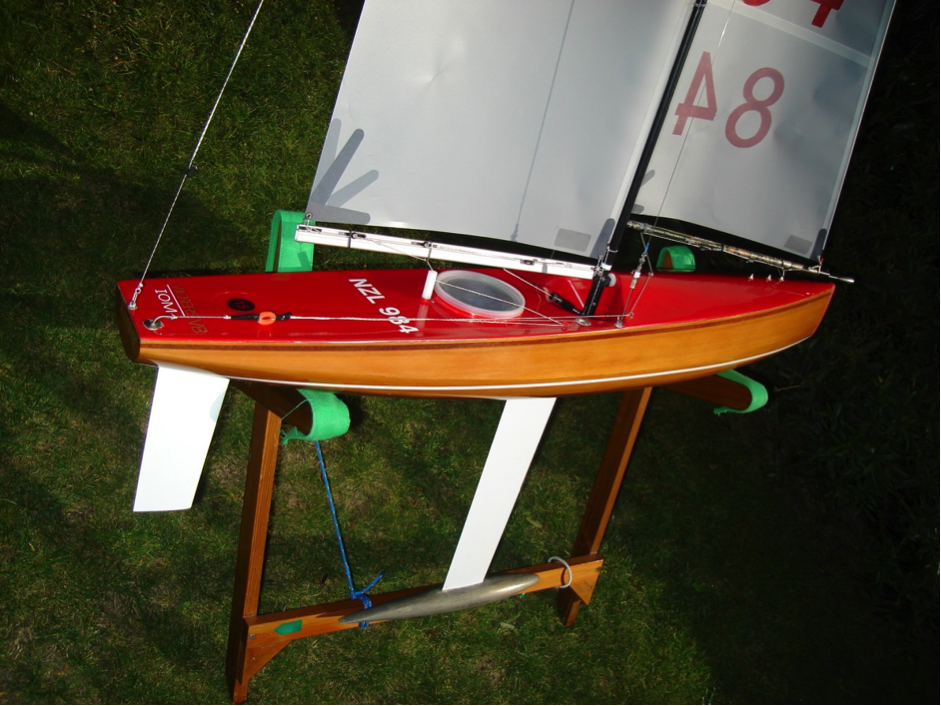
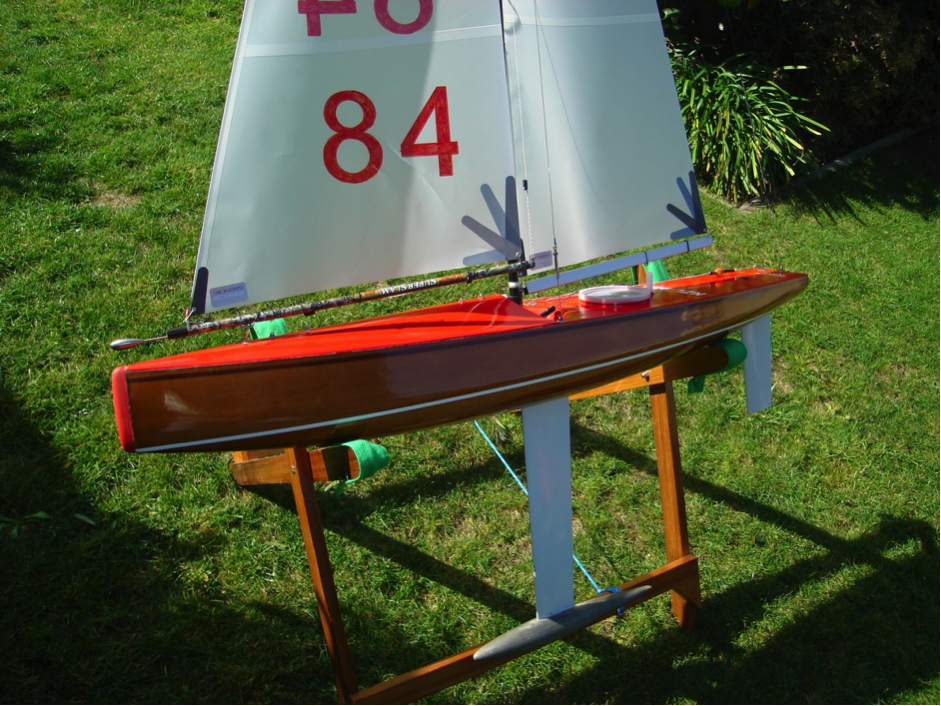
So all that was left now was to spray the hull with Awlgrip Awlwood varnish and the deck with a red automobile spray can from Supercheap auto.
I gave the bulb 5 coats of epoxy resin and left it unpainted as the painted versions always seem to get scratches on the bottom and I am always sanding and repainting it.
I fitted the RMG winch, a Hi tech waterproof servo, Ian Vickers sails and now I ‘m off sailing.
The yacht including A rig weighs 3765 grams before fitting the battery and trim ballast. The hull is very stiff being 2.5 mm thick cedar fibreglassed inside and out.
Basil Hart
Radio Yacht Squadron Nelson
New Zealand
May 11 2015

That is a very god looking yacht. Well done. Alex
That is a very good looking yacht. Well done. Alex
Basil.
I am new into building a marble head.
I have western red cedar but no t quarter sawn.
Where in Australia can I get good quality light coloured cedar that smells like pencil sharpenings?
Lovely smell!!.
Also ..I don’t understand the “pot” in the mid ships?
What is its purpose?
Hope to hear from you.
Your yacht is just gorgeous!
Better looking than carbon fibre in my old fashioned opinion.
Cedar verses carbon….
Whats your take?.
Pete